How to make custom axle tubes
One of the problems I first encountered when making customs was trying to find the right wheels with the right length axles.. I had to settle for what I could find that fit and the results were less than desirable.. So what I did was research on how to fix this problem .. Now this idea is by far not original but it is what I learned and how I do it. There are other methods and techniques that others use and I will also be exploring some other techniques, which when I learn them I will share them here as well. There are 2 techniques I use. One for plastic bases and one for metal bases. I will cover both.
Also please note that one thing I learned is that when you install axle tubes, some cars have tabs on their interiors or body that hold the axles down. they will have to be trimmed down in order for the car to fit back together properly.
Click on any image to see a larger picture.
Also please note that one thing I learned is that when you install axle tubes, some cars have tabs on their interiors or body that hold the axles down. they will have to be trimmed down in order for the car to fit back together properly.
Click on any image to see a larger picture.
Plastic bases
Tools needed
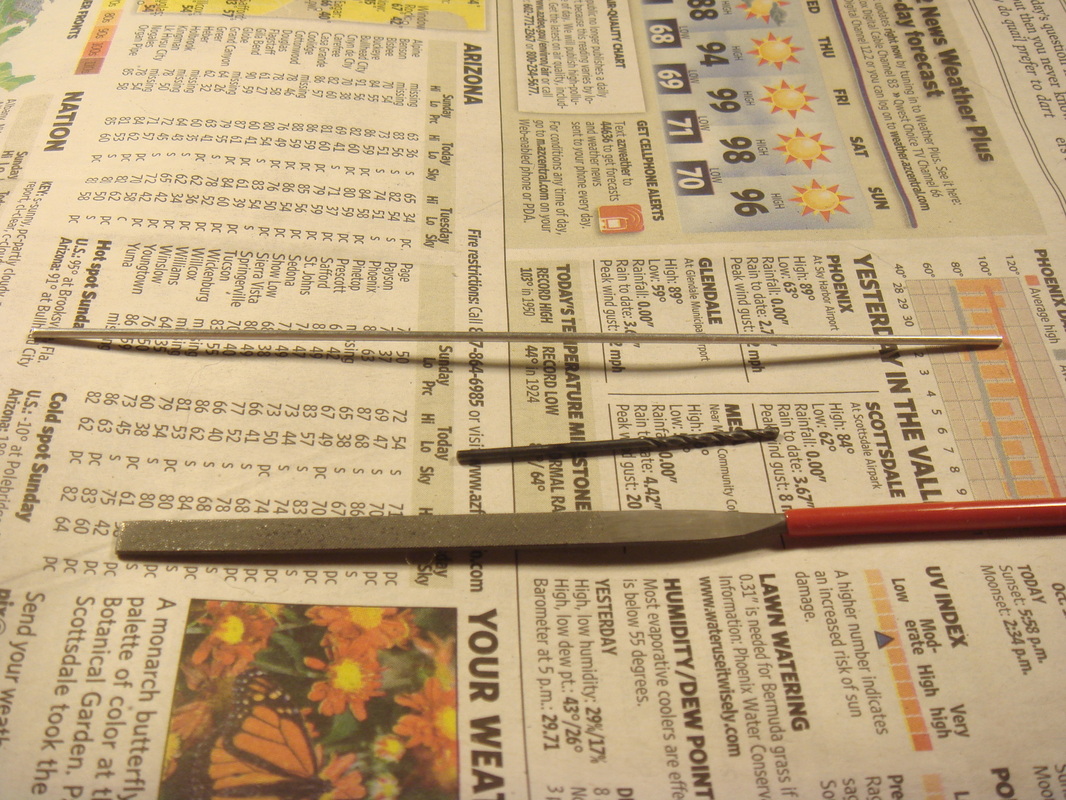
1/16" aluminum tube, 1/16" drill bit and small file.
First off you will need the axle tubes themselves.. I use 1/16" aluminum tubing.. The axles fit right into them. Found at my local Hobby Bench store.
1/16" inch drill bit and some small files.
Drill (I prefer a cordless with adjustable speeds but any will work.)
A razor knife and an x-acto knife.
A fine line sharpie to mark your cut on the tube.
Glue, I use Loctite gel control super glue.
Small pair of wire cutters.
1/16" inch drill bit and some small files.
Drill (I prefer a cordless with adjustable speeds but any will work.)
A razor knife and an x-acto knife.
A fine line sharpie to mark your cut on the tube.
Glue, I use Loctite gel control super glue.
Small pair of wire cutters.
Step 1
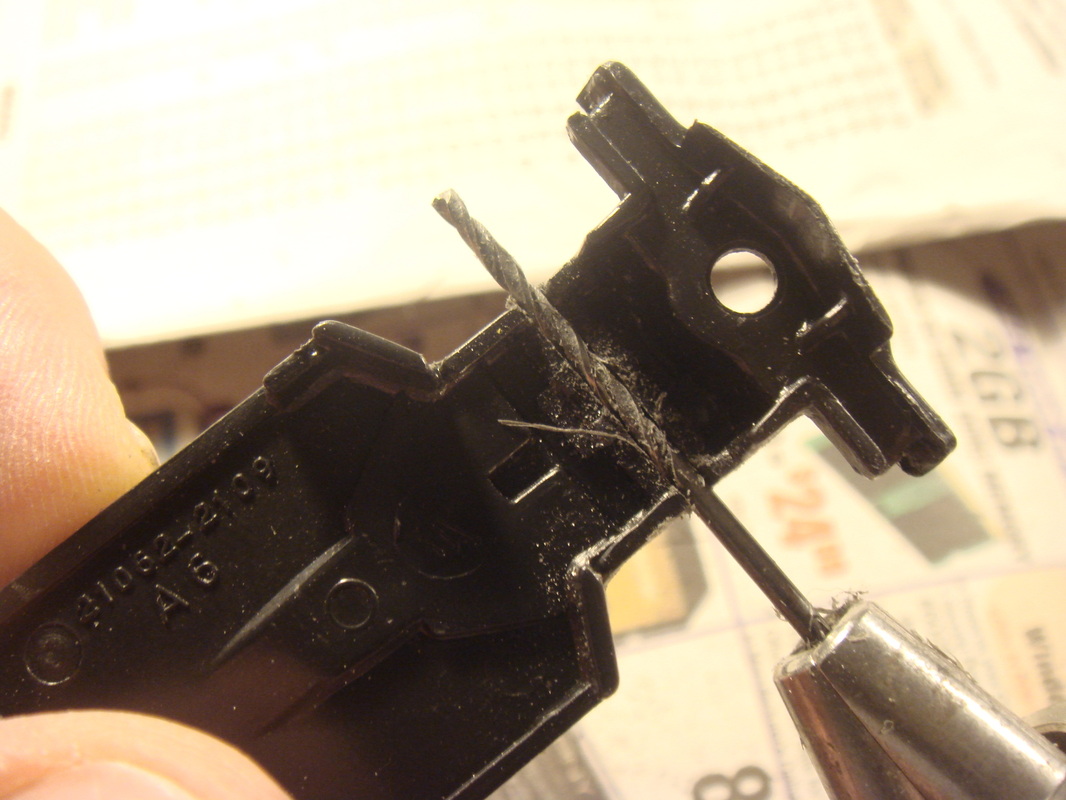
Cutting off the tabs that hold the axles in
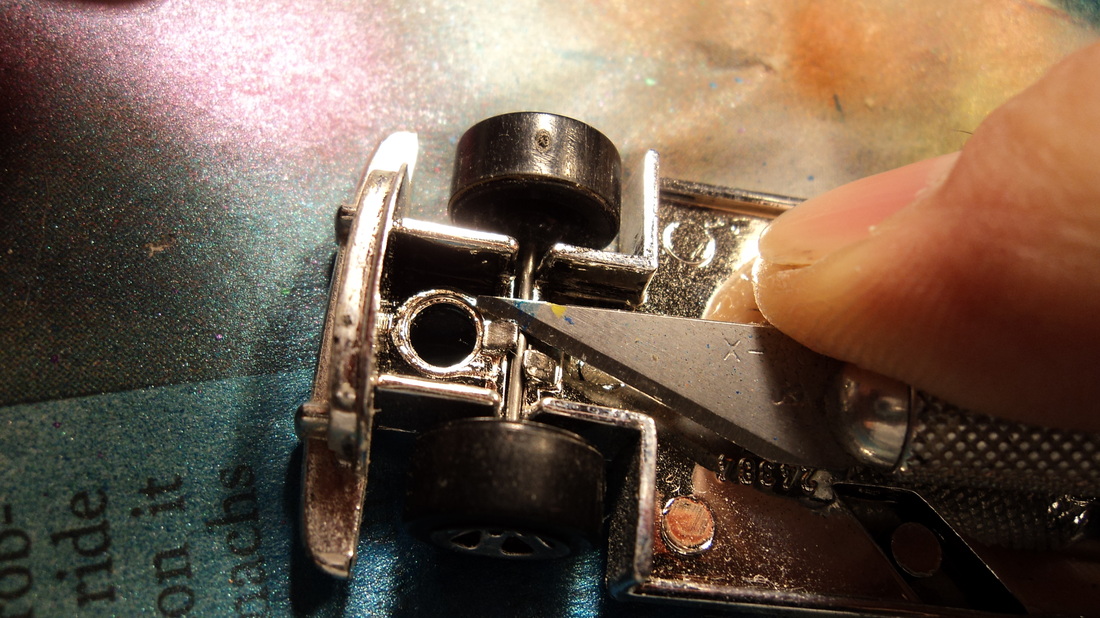
First thing is to release the old axle and wheels from the base. Take your x-acto blade and locate the tabs that hold the axle in place and cut them off flush.
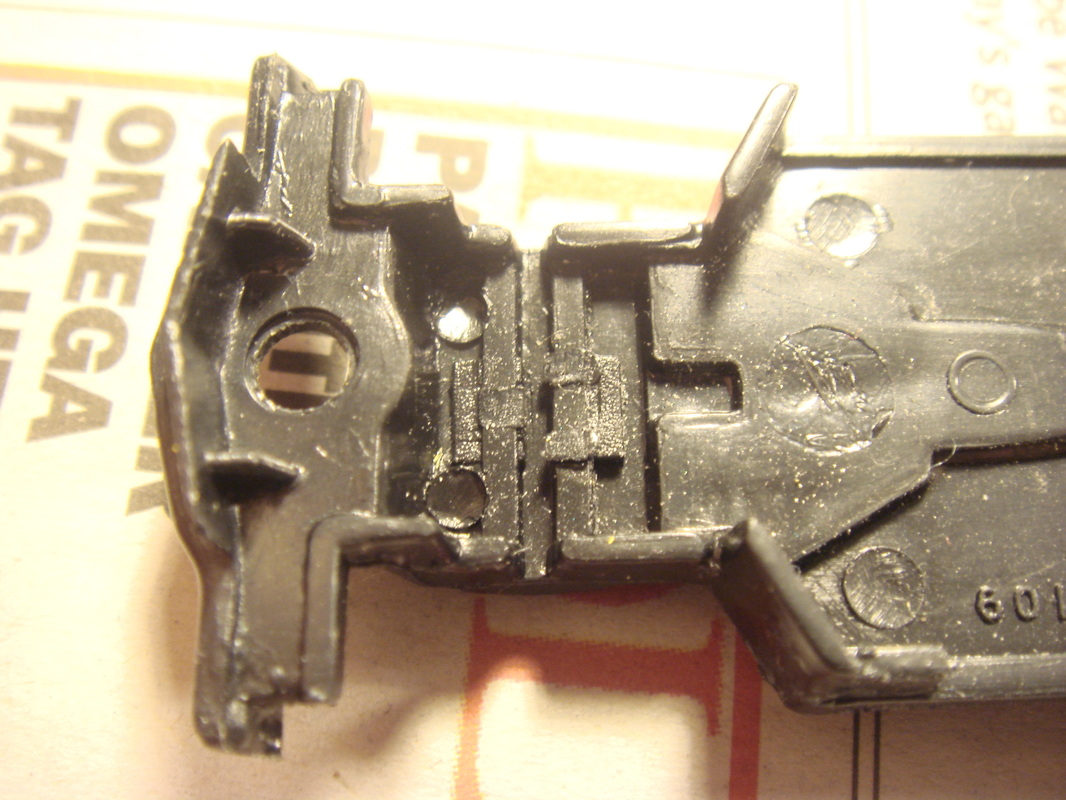
Once that is done and both axles are removed I will hit the channel where the axles were with the side of a small flat file just to make it easier for the next step.
See the Metal base section for an alternate method..
Once that is done and both axles are removed I will hit the channel where the axles were with the side of a small flat file just to make it easier for the next step.
See the Metal base section for an alternate method..
 With tabs removed, axle comes right out. |
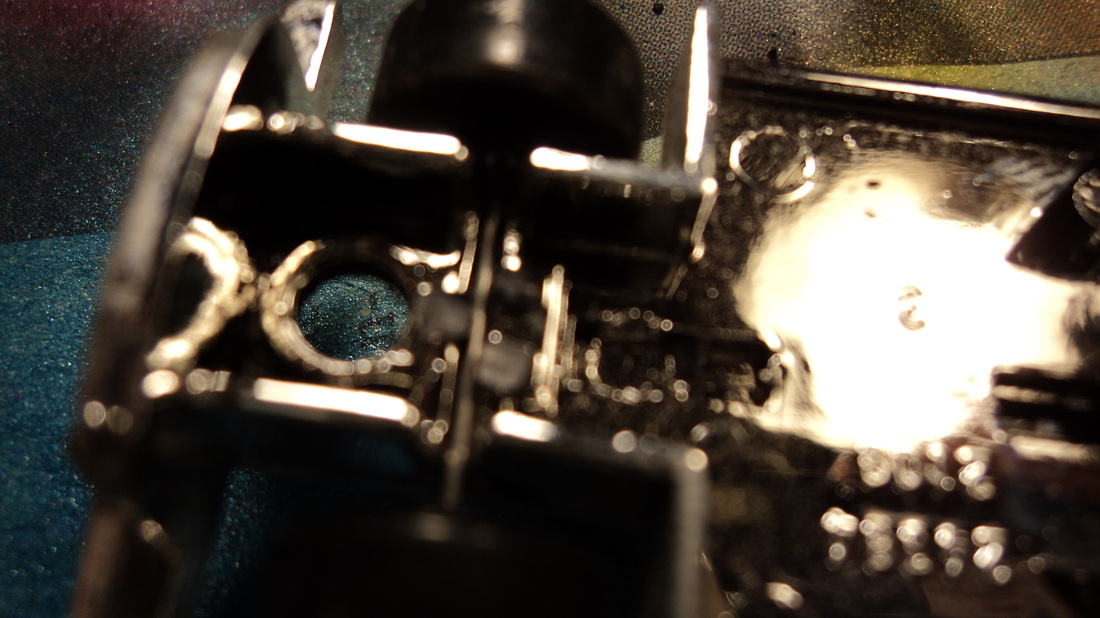
 Filing channel just to remove the remainder of the tabs |
Step 2
Drilling out the channel to make it round and 1/16"
Now that you have the axles out and the channel filed down a little , It's time to drill the channel out a little bit to make it round and 1/16" to fit the axle tubes.
Starting with one side I will take the 1/16" drill bit on a slow speed and start drilling where the channel is. work the drill all the way from one side to the other being careful to keep the drill level with the plastic, otherwise you may end up with one side lower than the other and a car that sits on 3 wheels.. I repeat the process on all 3 wheels. start on one side and let the drill pull through to the other side. It takes a little practice but its easy.
Starting with one side I will take the 1/16" drill bit on a slow speed and start drilling where the channel is. work the drill all the way from one side to the other being careful to keep the drill level with the plastic, otherwise you may end up with one side lower than the other and a car that sits on 3 wheels.. I repeat the process on all 3 wheels. start on one side and let the drill pull through to the other side. It takes a little practice but its easy.
Step 3
With channel drilled out the axle slides right in
Now that you have the channel prepared its time to install the axle tubes.
First step is to slide the tubing stock in from one side until it's flush on the other side. Make a mark with your sharpie where it will be flush with the other side once you cut it. Don't worry if you cut the tube too long,you can file it down flush once it's installed.
Next remove the tube, With your razor knife make a cut on the tube, I usually roll the tube as I cut it. Even though the tube is soft and you can slice through it you can pinch or crush the tube by doing this.. If you roll it as you cut it it will give you a nice round end.
Now that you have your first tube cut, I take a small file and file the rough edges down slightly to take any burrs off. Also now is a good time to check the tube for axle fit, I cut a flattened end off of an axle to use as a test piece. It's no fun to find out at final assembly time that you have an obstruction in your tube preventing your axle from going in all the way, so take your test piece and push it all the way through the tube to make sure it clears, you can do it on both sides if your axle is too short to go all the way through.
Now it's time to install the tube, start at one side and slide the tube in until its flush with the other side, If your drilling is correct the tube should be cradled perfectly in the channel, no gaps between the tube and the base. also be careful and make sure you select a straight tube to start with, as they bend easy and if they are not straight they can throw your wheels off of being level and you will have a car that wobbles.. not cool..
Now that the tube is in place, apply a little glue to keep it in place and repeat for the other axle..Don't worry if your tubes are not flush with the sides, Once the glue dries you can file the ends down flush. Or leave them a little extended for a wider stance..
See tutorial at the end of the how to for installing your new wheels..
 With mark on axle tube for cutting. |
 Cutting axle tube by rolling it as you cut it. |
 Sliding the axle tube in, Or you can just drop it in from the top.But sliding it in is better as it pushes any debris out of the way for a better fit. |
 With axle tube in place. |

With both axle tubes in.
Additionally I have learned that you can do plastic bases the same as you do the metal bases. With some very careful and gentle drilling you can leave the tabs intact and it gives the tube a much better fit. See below for the how to on metal bases.
Metal bases

Metal bases
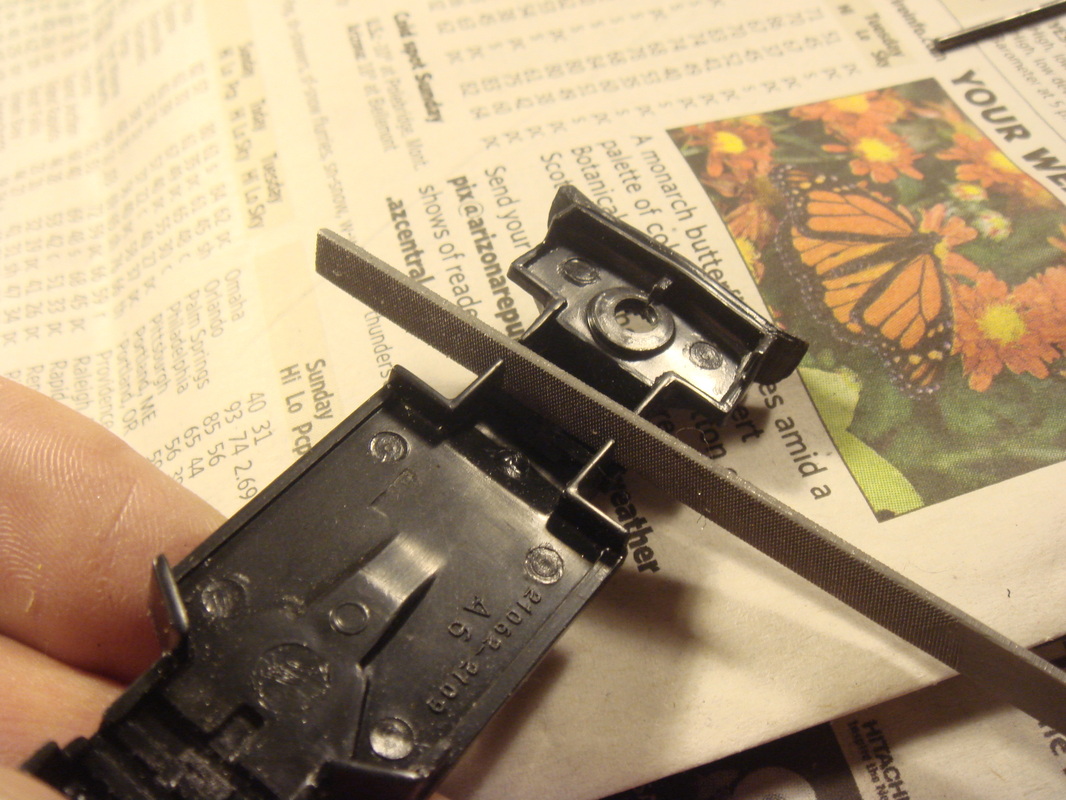
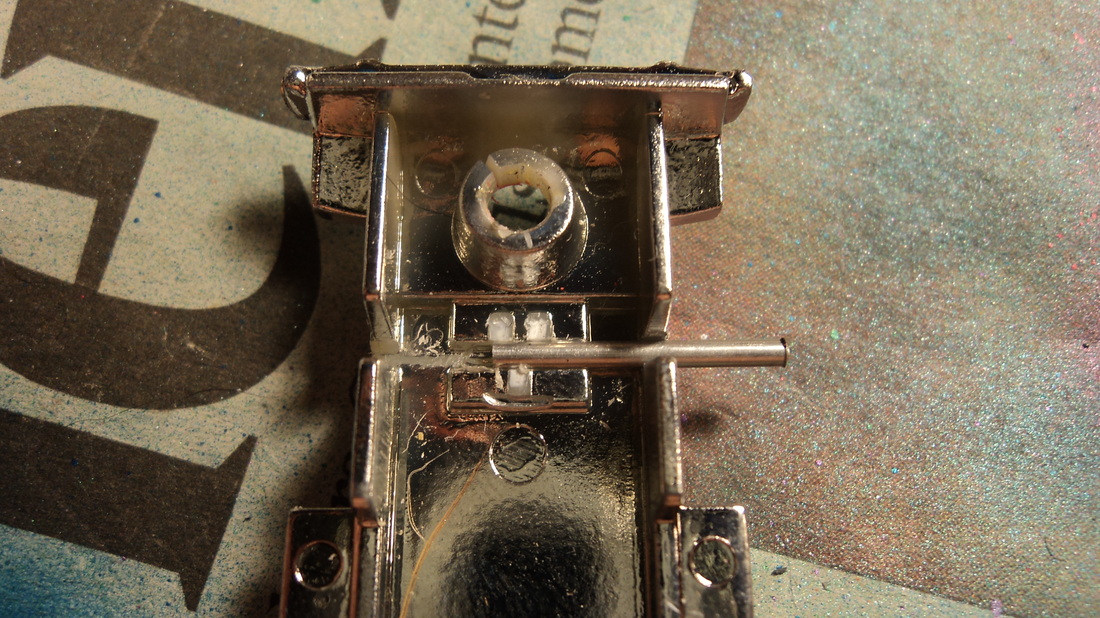
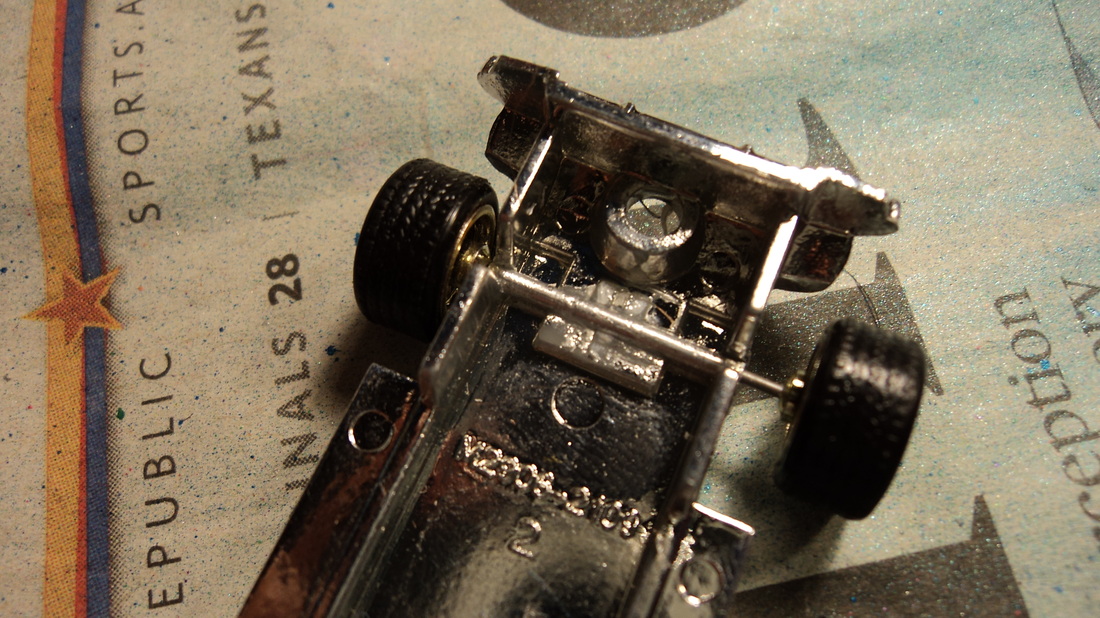
Metal bases are not that much different other than how you remove the wheels. I find it easiest to simply bend the wheel upwards and cut the axle, the wheel will then come off and you can work the other side out of its tabs. (That's why it's a good idea to save your axles from plastic base donor cars)
You still drill the channel from the sides, and actually since you do not remove the metal tabs holding the axles in, once you drill through them they make the axle tube fit snug in the channel.
You still drill the channel from the sides, and actually since you do not remove the metal tabs holding the axles in, once you drill through them they make the axle tube fit snug in the channel.
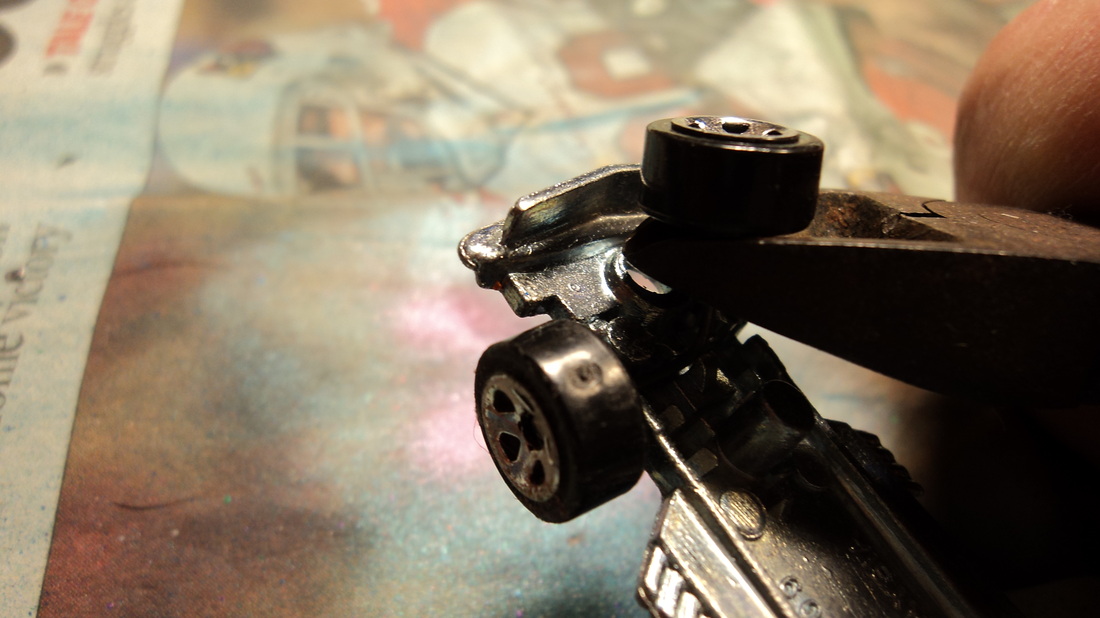 Cutting the wheels off of a metal base |
 Drilling out the channel on a metal base,Notice how it goes under the metal tabs,only slightly hollowing them out |
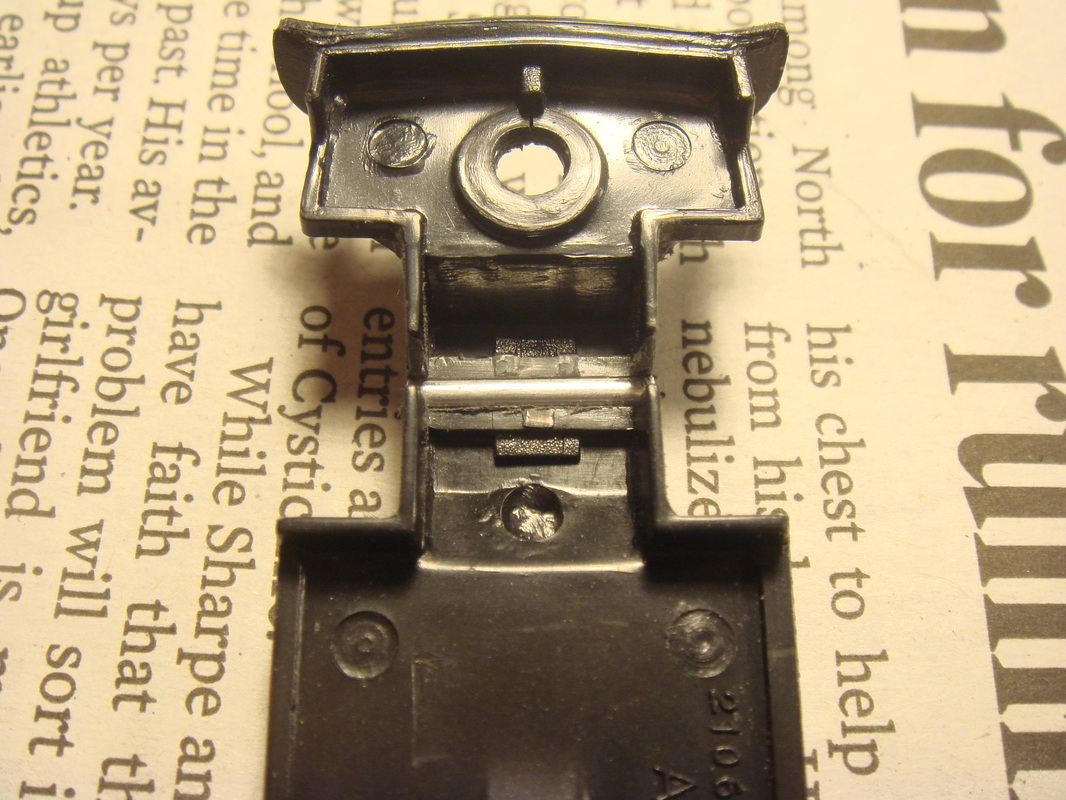
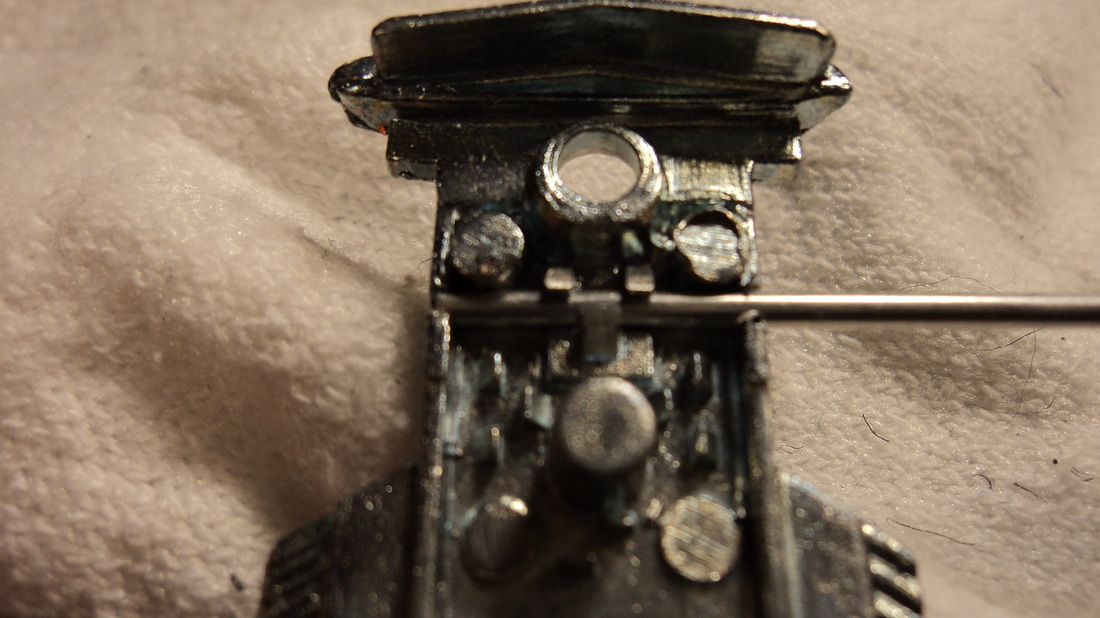 The tube slides right in place under the metal tabs. |
 And here it is 2 perfectly installed tube axles.. |
Installing your custom wheels
Custom wheels with donor axles
Once you have the axle tubes in and you are finished painting/prepping your base it's time to install your wheels. Make sure you are done working on your base, as once you glue the wheels in it is next to impossible to remove them.
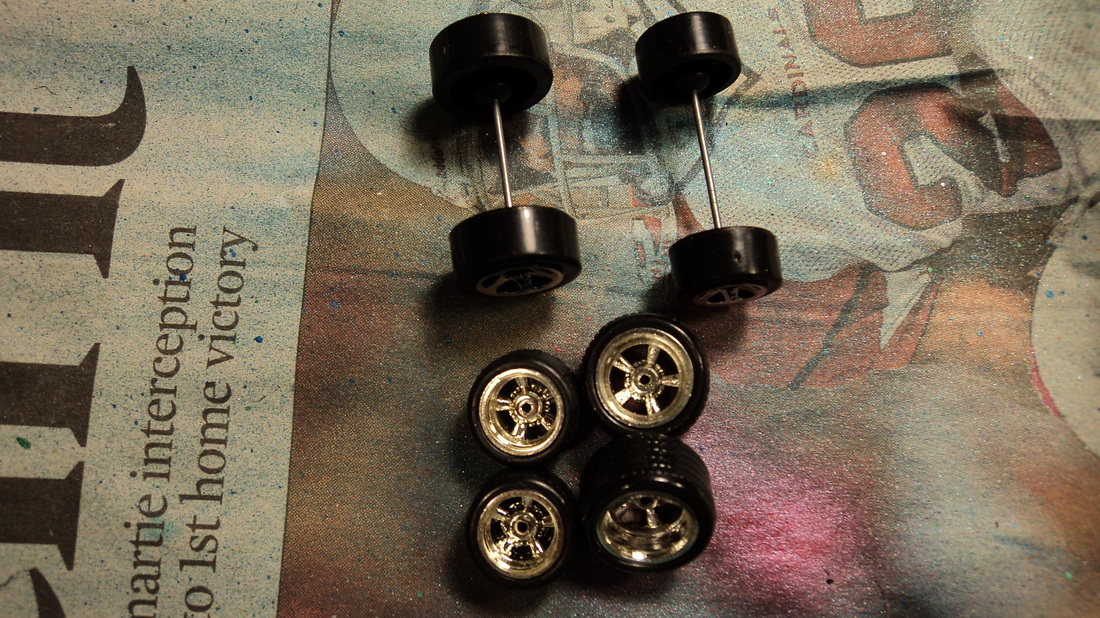
First you will need your custom wheels and some donor axles, so if you saved your axles from earlier then this should be no problem.
Take your donor axle and cut them with wire cutters approximately in the middle of the axle. You should now have 4 axle stubs.
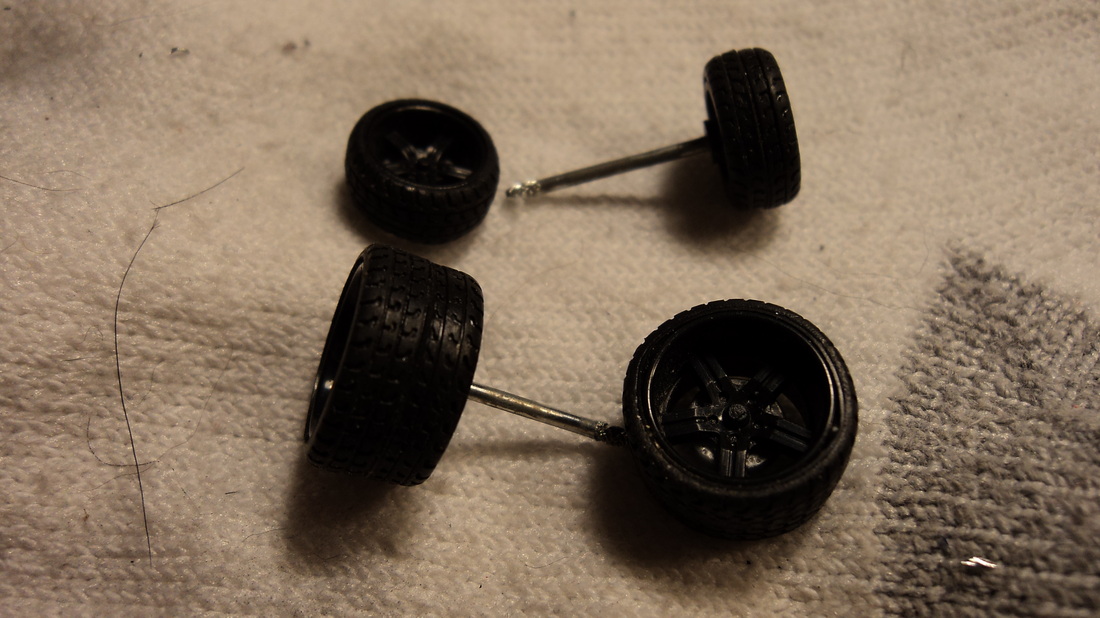
Now one thing I learned is that before you glue your wheels in, test fit each axle in the tube. If you cut your axles too long then you will not be able to push your stubs in all the way. If you are like me then its not too cool, I like my axle stubs in all the way to the wheel hub for a tight fit.
Now that you have everything in order, take your first stub, put it through the wheel and put a dab of super glue on the tip that goes into the tube, If you put to much on or if you glue the wheel to the axle then the wheel will not turn, so I put glue on the very end (the end without the wheel) and push it into the axle tube all the way. once it's in I usually push the the axle in a little more with the tip of my X-acto blade, Then I make sure the wheel turns and keep turning the wheel to make sure it didn't get accidentally glued. Repeat with the next axle. I test fit the next axle length first , then glue it in. I go back and check the previously installed wheel to make sure it rolls and also pull on it a little bit to make sure it doesn't come out of the tube.
Once you are done with the fourth wheel .. you are rolling on custom wheels.. It takes a little practice but it is not hard to master and comes in handy for wheel swaps.
Hope this has helped and please email me if you have any questions..
ALWAYS and I mean ALWAYS check your wheel clearance in the wheels wells before gluing your wheels in.. The last thing you want is to go and assemble your new custom and find out the wheels bind in the wells... Been there done that... It's far easier to make modifications to your creation BEFORE you paint and glue your parts ... Trust me on this..................
First you will need your custom wheels and some donor axles, so if you saved your axles from earlier then this should be no problem.
Take your donor axle and cut them with wire cutters approximately in the middle of the axle. You should now have 4 axle stubs.
Now one thing I learned is that before you glue your wheels in, test fit each axle in the tube. If you cut your axles too long then you will not be able to push your stubs in all the way. If you are like me then its not too cool, I like my axle stubs in all the way to the wheel hub for a tight fit.
Now that you have everything in order, take your first stub, put it through the wheel and put a dab of super glue on the tip that goes into the tube, If you put to much on or if you glue the wheel to the axle then the wheel will not turn, so I put glue on the very end (the end without the wheel) and push it into the axle tube all the way. once it's in I usually push the the axle in a little more with the tip of my X-acto blade, Then I make sure the wheel turns and keep turning the wheel to make sure it didn't get accidentally glued. Repeat with the next axle. I test fit the next axle length first , then glue it in. I go back and check the previously installed wheel to make sure it rolls and also pull on it a little bit to make sure it doesn't come out of the tube.
Once you are done with the fourth wheel .. you are rolling on custom wheels.. It takes a little practice but it is not hard to master and comes in handy for wheel swaps.
Hope this has helped and please email me if you have any questions..
ALWAYS and I mean ALWAYS check your wheel clearance in the wheels wells before gluing your wheels in.. The last thing you want is to go and assemble your new custom and find out the wheels bind in the wells... Been there done that... It's far easier to make modifications to your creation BEFORE you paint and glue your parts ... Trust me on this..................
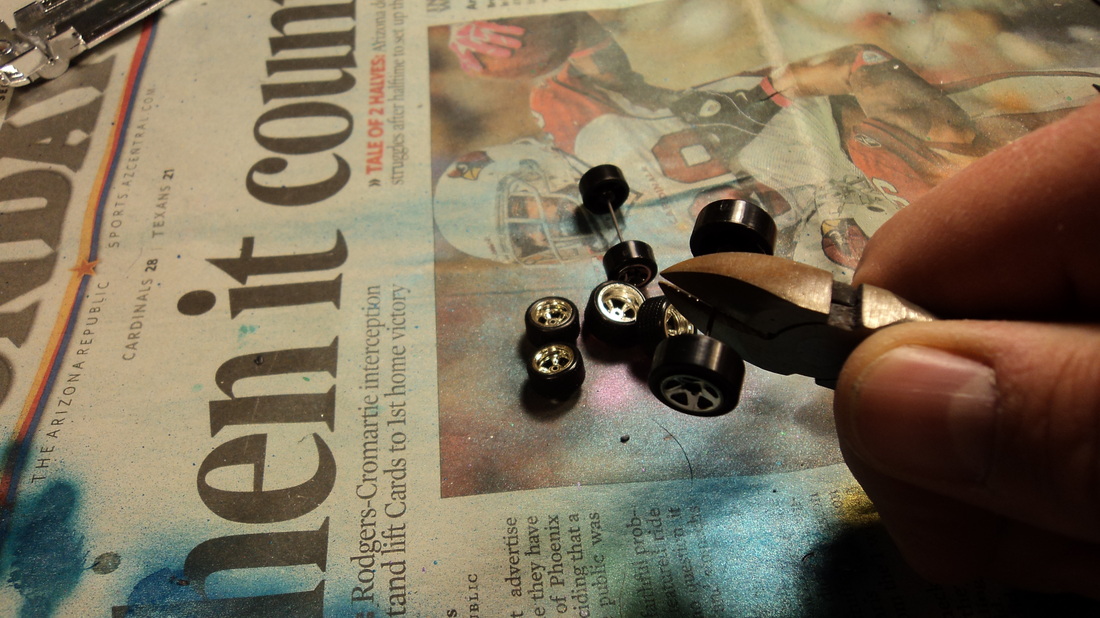 Cutting the axles in half |
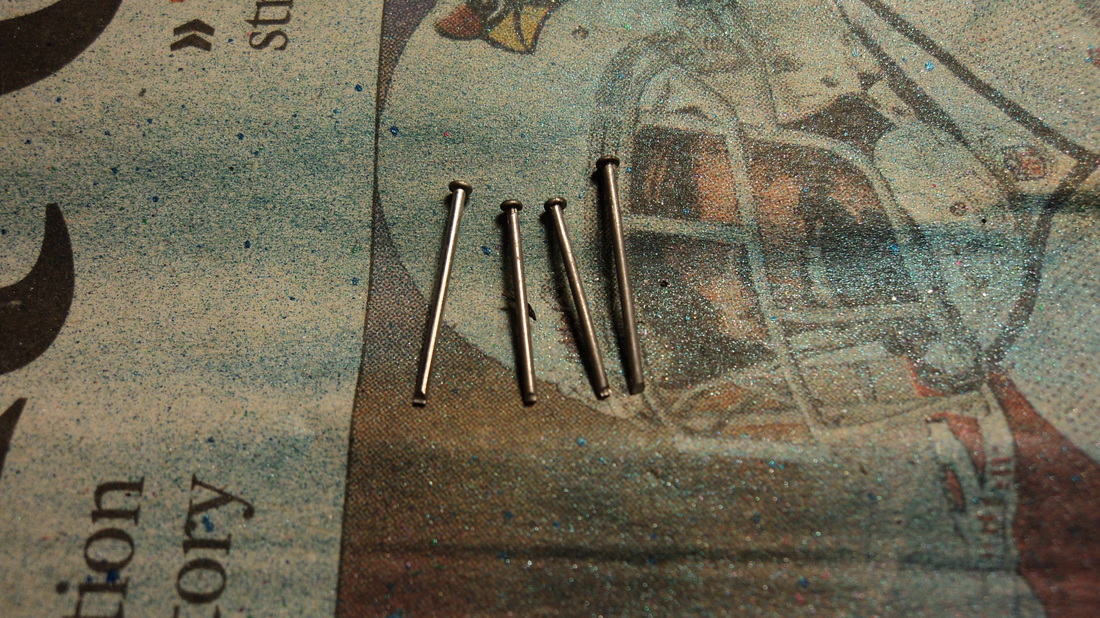 4 axle stubs |
 Installing the axle stubs into the tubes. |
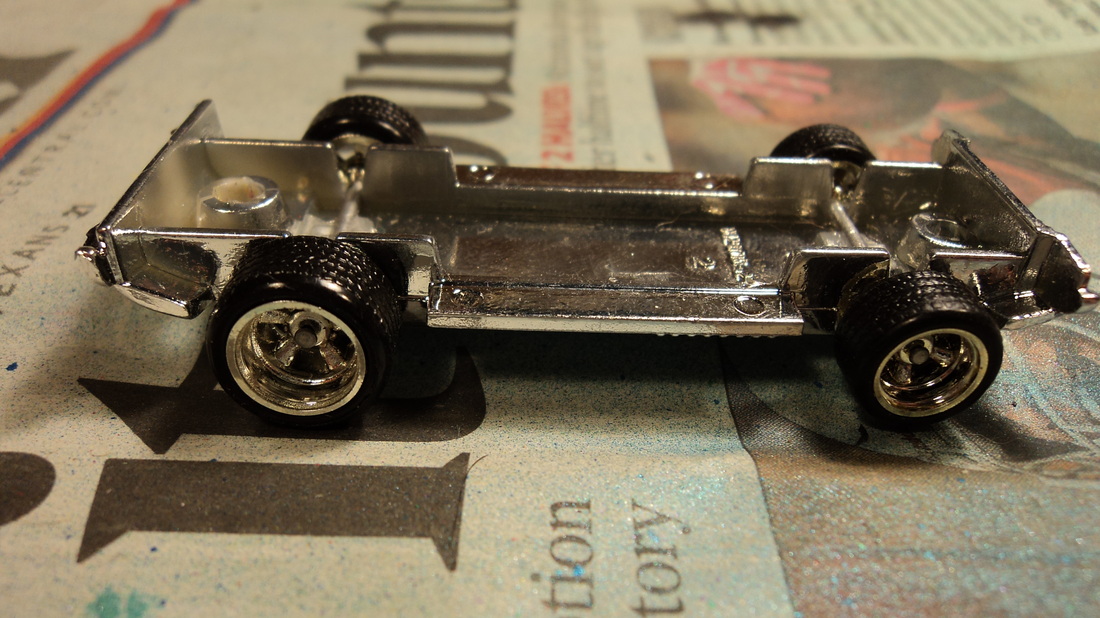 Finished with a new set of shoes on... |
A note About custom wheels
Nice Custom Maisto wheels
Be sure to experiment with various models of Die-cast for wheels. Jada. M-2 and Maisto in particular have nice real riders that are press on style and can be used on most other brands. You can buy the right size axle rod (At your local hobby store) to make your own axles.. Most important thing is variety to your customs. Experiment with different wheels, axles and techniques until you find what works for you on various applications.
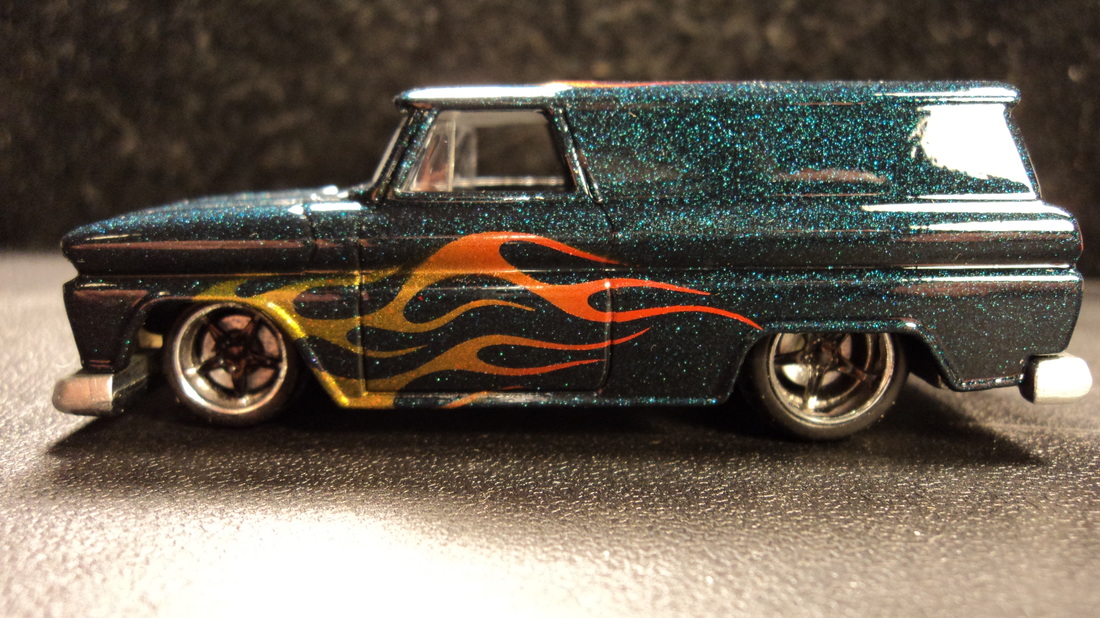
Hot wheels 64 GMC panel with Maisto Pro rodz wheels... Tasty..
